Introduction
Are you finding”How to Make Peach Jam ? at home. I am here for you. Making peach jam at home is a delightful way to preserve the juicy sweetness of summer peaches. Not only does it taste better than store-bought varieties, but it’s also a fun and rewarding process. This guide will walk you through each step to ensure your homemade peach jam is a success.
Selecting the Perfect Peaches
Choosing Ripe Peaches
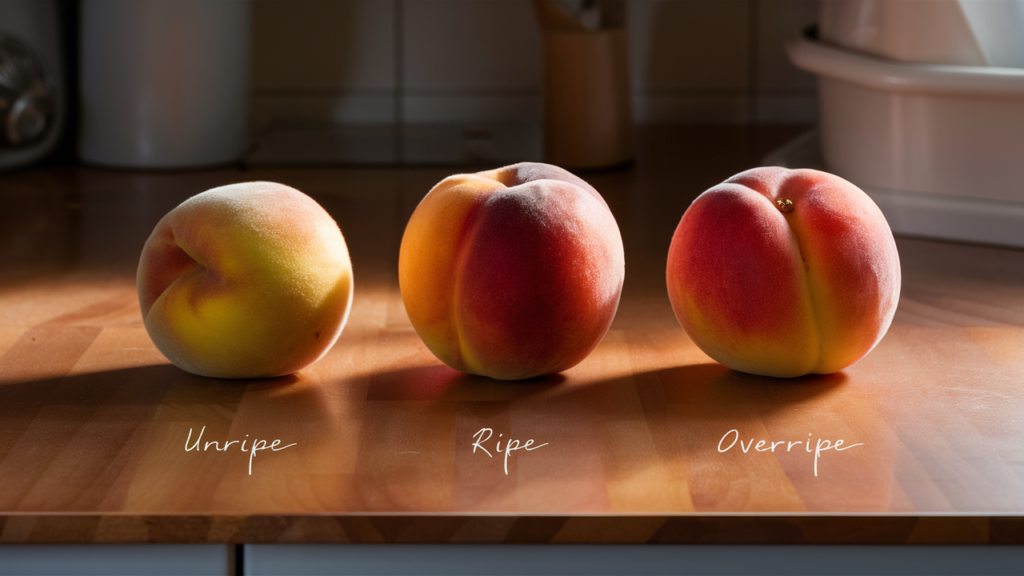
To make the best peach jam, start with the best peaches. Look for peaches that are fragrant, slightly soft to the touch, and free from blemishes. The ideal peaches for jam are those that are fully ripe but not overripe.
Signs of Ripeness
Ripe peaches have a vibrant color, a sweet aroma, and yield slightly to pressure. If the peach feels hard, it’s not ripe yet. If it’s mushy, it’s too ripe.
Best Varieties for Jam
Because their pits are easier to remove, freestone peaches are the best choice for creating jam. Varieties like Elberta, Redhaven, and O’Henry are excellent choices.
Washing and Preparing Peaches
Thoroughly wash the peaches to get rid of any dirt or pesticides. Towel them dry with a clean towel.
Essential Ingredients and Tools
Ingredients Needed
To make peach jam, you will need the following ingredients:
- Fresh Peaches: About 4 pounds of ripe peaches.
- Sugar: 3 cups of granulated sugar.
- Lemon Juice: Two teaspoons of lemon juice, fresh.
- Pectin (Optional): 1 packet of commercial pectin, if desired for a firmer set.

Tools Required
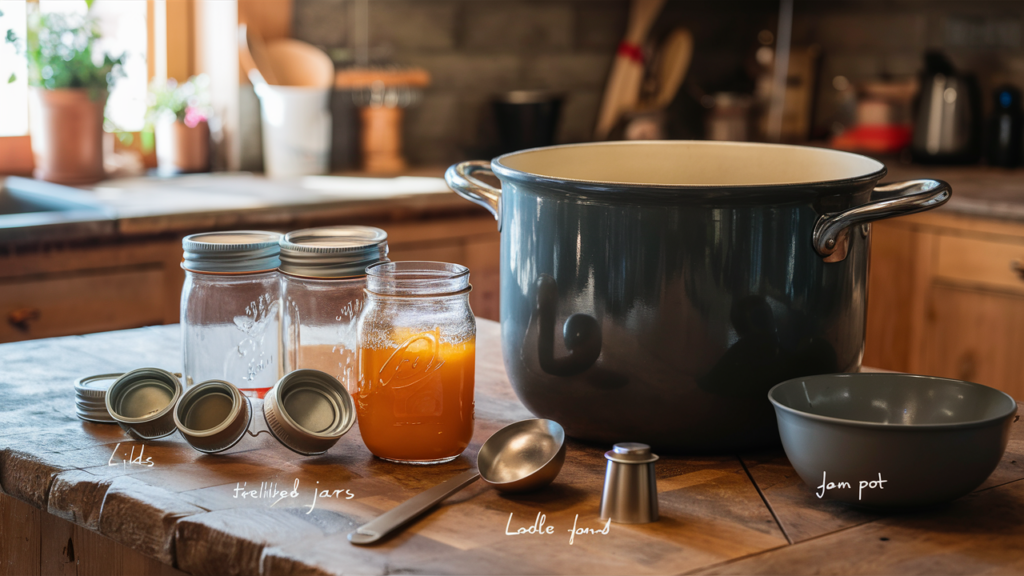
Gather these tools before you begin:
- Jam Pot: A large, heavy-bottomed pot.
- Sterilized Jars: Mason jars with lids and bands.
- Lids and Bands: For sealing the jars.
- Ladle and Funnel: For transferring jam into jars.
Preparing the Peaches
Peeling the Peaches
To peel peaches easily, use the blanching method:
- Bring a large saucepan of water to a boil.
- Create an ice bath in a large dish.
- Cut a tiny “X” off of the bottom of every peach.
- Immerse the peaches in boiling water for thirty seconds.
- Transfer them immediately to the ice bath.
- Once cooled, the skins will slip off easily.
Pitting and Slicing
Remove the pits from the peeled peaches:
- Halve the peaches and twist them apart.
- Remove the pit with your fingers or a spoon.
- Slice the peaches into even pieces.
Making the Jam
Cooking the Peaches
Combine the sliced peaches, sugar, and lemon juice in your jam pot. Stir to mix.
Boiling the Mixture
Stirring constantly, boil the mixture over medium heat until the sugar melts. Raise the temperature to a rolling boil on high. Simmer for 15 to 20 minutes while stirring continuously.

Achieving the Right Consistency
To test if the jam is set, place a small amount on a chilled plate and tilt it. It’s ready if it creases but doesn’t run.
Adjusting Texture
If the jam is too runny, continue boiling for a few more minutes. Stir and add a small amount of water if it’s too thick.
Canning the Jam
Sterilizing Jars and Lids
For ten minutes, submerge the jars and lids in a large saucepan of boiling water. Carefully remove them and place them on a fresh towel to dry.
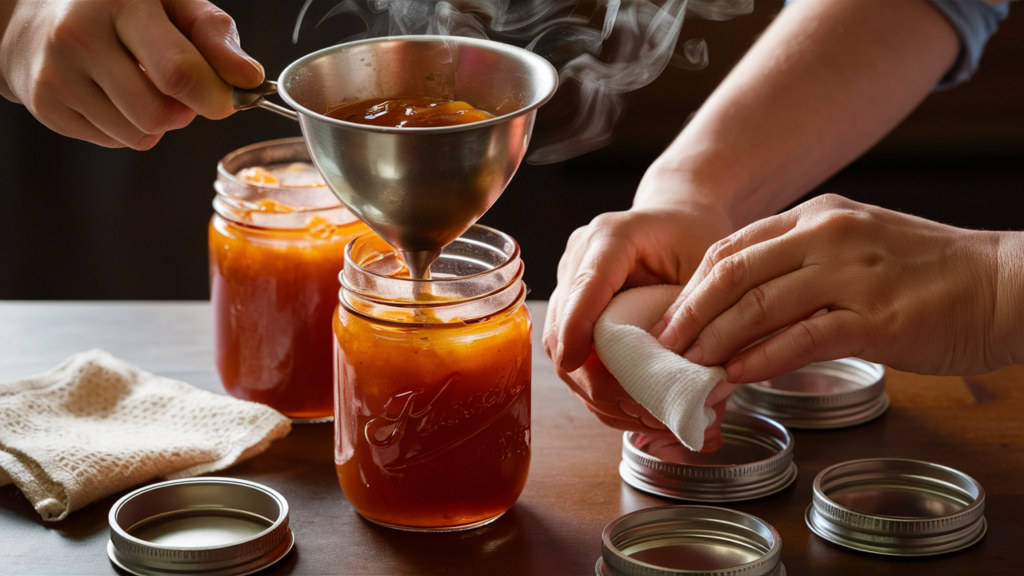
Filling and Sealing Jars
Using a funnel, ladle the hot jam into the sterilized jars, leaving about 1/4 inch of headspace. After giving the rims a quick wipe with a moist cloth, replace the lids. Put the bands on until they are fingertip tight.
Processing in a Water Bath
Immerse the filled jars in a bath of boiling water for ten minutes. Verify that they are truly submerged. Remove the jars and set aside to cool on a towel.
Storing and Enjoying Your Peach Jam
Storing in a Cool, Dark Place
For up to a year, keep the sealed jars in a cold, dark area.
Shelf Life of Homemade Jam
Properly processed and sealed, homemade peach jam can last up to 12 months.Use within a few weeks of opening and store in the refrigerator.
Creative Ways to Use Peach Jam
Spread peach jam on toast, stir it into yogurt, or use it as a glaze for meats. The possibilities are endless!
Troubleshooting Common Issues
Jam Not Setting
If your jam doesn’t set, it might need more cooking time. Alternatively, you can add pectin and reboil.
Cloudy Jam
Cloudiness can result from air bubbles. Stir gently and skim off any foam during cooking.
Mold Growth
Mold can form if jars are not properly sealed. Always use sterilized jars and process in a water bath.
Conclusion
Making peach jam is a straightforward process that brings the delicious taste of summer to your pantry. With these steps, you can enjoy homemade peach jam all the year.
FAQs
How long does homemade peach jam last?
Homemade peach jam can last up to a year if stored in a cool, dark place. Use it within a few weeks of opening and store it in the refrigerator.
Can I use frozen peaches for jam?
Yes, you can use frozen peaches. Thaw them completely and drain any excess liquid before starting the jam-making process.
What if my jam is too runny?
If your jam is too runny, continue boiling it until it reaches the desired consistency. You can also add a small amount of pectin.
How can I make my jam less sweet?
Reduce the amount of sugar in the recipe, but be aware that sugar helps with preservation and setting. You can also add a bit more lemon juice to balance the sweetness.
Do I need to use pectin?
Pectin is optional. It helps the jam set more firmly but isn’t necessary if you prefer a softer set or want to use a traditional recipe.
Does it taste good with peach juice?
Yes , I tried it and i cannot tell you how sweet it is, but it depends on your tongue taste